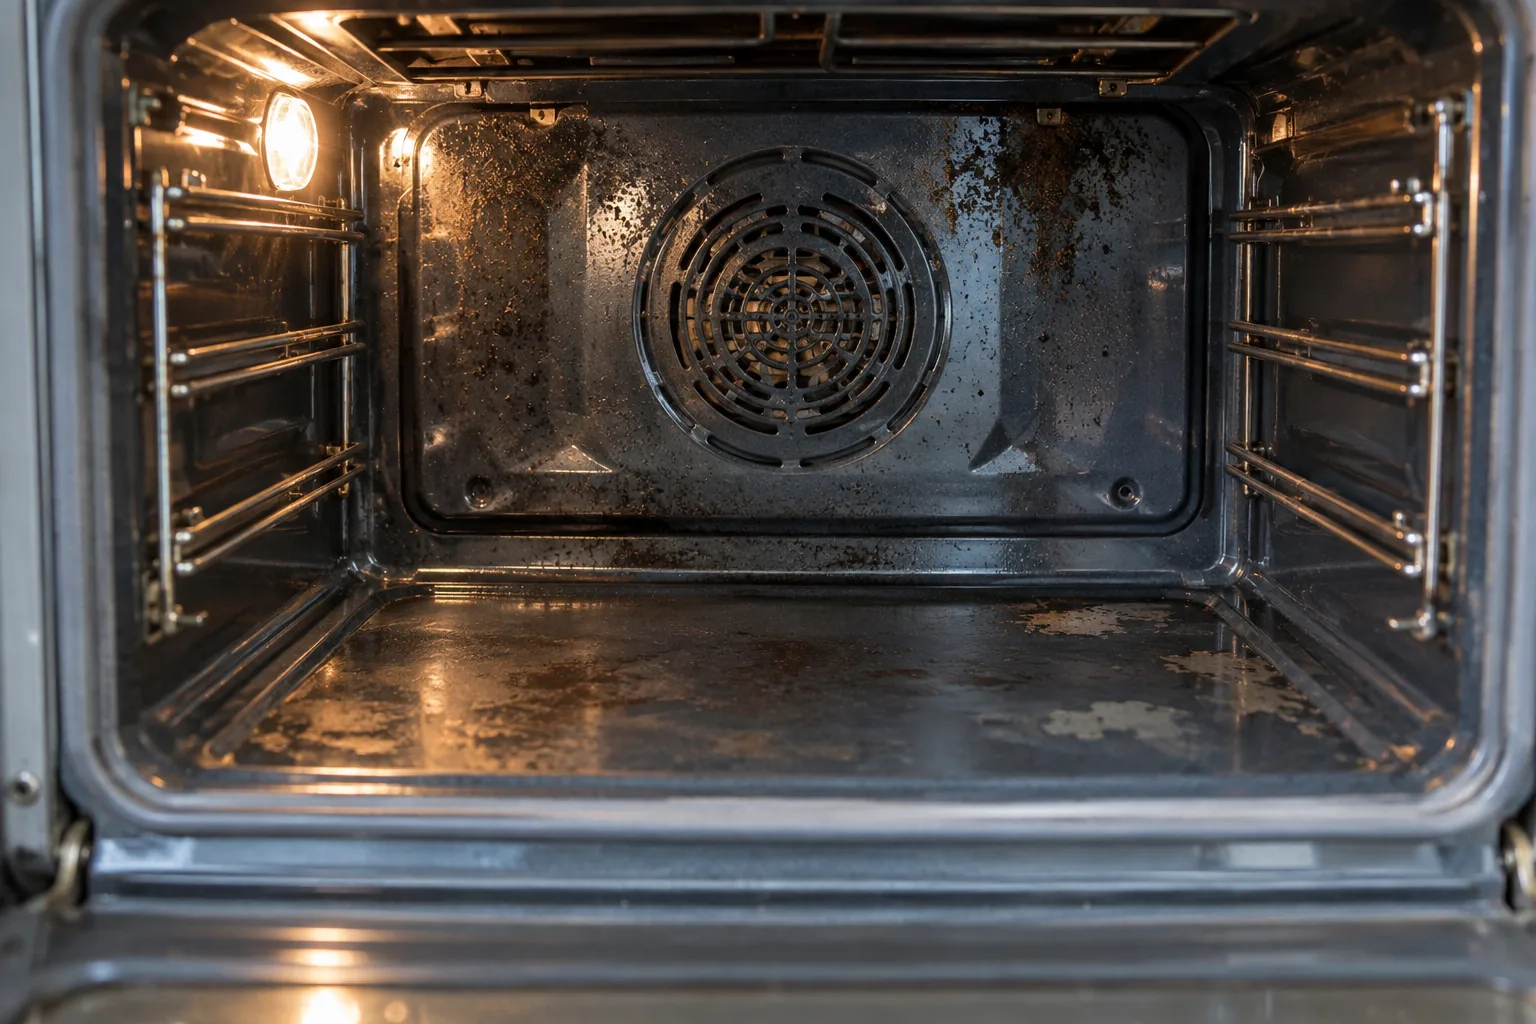
Baked-on residue usually sits on top of an oven surface and may soften or lift during suitable cleaning. Damage changes the surface itself: enamel may be chipped or etched, metal corroded, glass scratched, seals split or coatings worn away. If a mark has sharp edges, exposes a different layer or remains structurally unchanged when surrounding soil lifts, more force is unlikely to be the answer.
Inspect a cold, switched-off oven
Allow the appliance to cool fully and follow its safety instructions. Remove loose crumbs with no aggressive scraping, then use good neutral light. Grease can disguise defects, so note obvious chips, cracks and corrosion before cleaning begins.
If there is an electrical fault, damaged element, gas smell or unsafe door, stop using the appliance and contact the appropriate qualified professional. Cleaning does not make a faulty oven safe.
What ordinary baked-on residue looks like
Food and grease tend to form uneven layers, drips, spots or a brown-black film in cooking zones. The deposit may have raised edges or varying thickness. On a suitable surface, a correctly chosen process can soften it progressively rather than removing it in one dramatic scrape.
Age and repeated heating make residue more difficult, but difficulty alone does not prove damage. Realistic cleaning may improve the surface without restoring a factory-new appearance.
Signs the enamel itself has changed
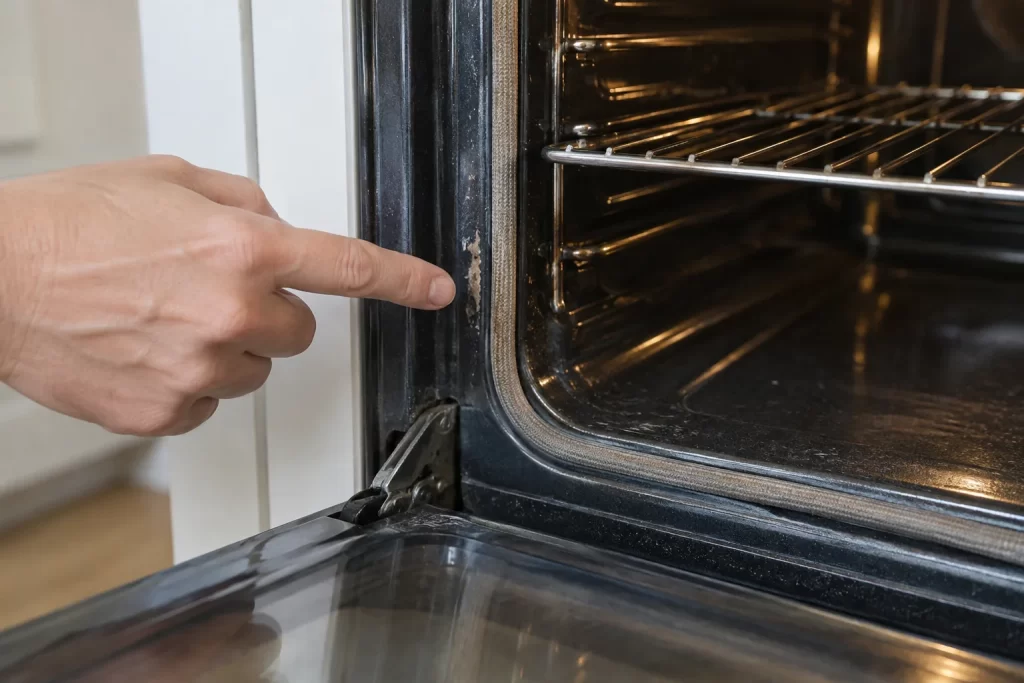
A chip often has a defined edge and reveals metal or a contrasting base below. Worn enamel can look dull, thin or permanently rough. Corrosion may produce pitting or coloured oxidation around exposed metal. These changes cannot be cleaned back into coating.
Do not test a suspected chip with a blade. Photograph it and check the appliance guidance. Continued abrasion may enlarge the area and create loose fragments.
Glass: film, staining or scratches
Greasy film can make door glass look cloudy and may respond to an approved degreasing method. Mineral or heat-related staining can be more persistent. A scratch remains a line in the glass and may catch light from different angles even when the panel is clean.
Some doors contain multiple panes with inaccessible space between them. Do not dismantle the door unless the manufacturer provides a safe user procedure. Damaged, loose or cracked glass needs appliance advice, not stronger cleaner.
Door seals are not scrubbing surfaces
Seals may hold crumbs and light residue, but they can tear, detach or lose shape. A split, hardened or hanging seal is maintenance. Pulling it to reach behind or soaking it with strong product may make the closure worse.
Report whether the door closes evenly. Heat escape or a failed latch should be assessed under the appliance instructions.
Racks and trays tell a separate story
Racks can carry carbonised grease, discolouration and corrosion at the same time. Chrome loss or rust pitting is not a dark coating waiting to be stripped. Non-stick trays may have scratched or peeling finishes that should not be aggressively treated.
Confirm which removable components belong to the appliance and whether they are suitable for the planned process. Do not include baking stones, thermometers or liners by assumption.
Catalytic and self-cleaning surfaces need special care
Textured catalytic liners and pyrolytic ovens have manufacturer-specific instructions. Treating every interior wall as standard enamel can impair specialised coatings. Identify the model and read its manual before applying products or tools.
A self-cleaning programme also has safety and preparation requirements. It is not a substitute for inspection, and it should not be run when the oven is faulty.
A practical before-and-after test
- Photograph the cold oven in even light.
- Identify the surface type and manufacturer restrictions.
- Choose a small, appropriate test area away from damage.
- Allow the approved method to work without excessive force.
- Remove residue and inspect only after the area is clean and dry.
If the deposit reduces while the underlying finish stays consistent, it was at least partly residue. If a pit, chip, scratch or different layer remains, document it as surface condition.
Why stronger is not always better
Aggressive abrasives can create scratches that trap future soil. Incompatible chemicals may dull finishes, affect aluminium or damage markings. Excess liquid can reach insulation, controls or door cavities. The safest method is specific to the appliance, not the darkest patch.
Professional oven cleaning can address appropriate residue, but it cannot replace enamel, repair a seal or certify an appliance.
Set expectations before the appointment
Share the make and model, photographs and known faults. Say whether the oven has self-cleaning liners and whether racks are original. Note previous use of caustic products, foil liners or scraping tools.
Follow the oven-cleaning preparation checklist so the appliance is cold, accessible and free from unrelated items. Leave fixed panels in place unless advised otherwise.
When cleaning should pause
- A crack, loose panel or exposed electrical part is visible.
- The surface begins flaking or transferring its own colour.
- A strong abnormal smell suggests an appliance fault.
- The door, hinge, latch or seal is not secure.
- The manual excludes the proposed method.
- The mark can only be pursued by damaging force.
At that point, record the condition and seek manufacturer, repair or engineering guidance as appropriate.
The honest finish
A clean used oven can still show age. Heat tint, worn markings, scratched trays and enamel chips may remain after removable grease has gone. Those signs should be explained, not disguised by wet shine or promised away.
The distinction protects both appliance and expectations: remove what is safely removable, preserve intact finishes, and hand repair questions to the people qualified to answer them. More pressure cannot turn damage back into residue.
Keep a condition note for rented or managed homes
Photograph the oven before and after it is cool and dry, including one wide view and close images of defects. Note model details and the location of a chip or failed seal. This helps a landlord, tenant or manager route the issue to cleaning or maintenance without arguing from a dark photograph.
Do not label normal age as misuse without evidence. The purpose of the note is to separate outcomes, not assign liability.
Inspect again after the first normal use
Once cleaning is complete and the appliance has been returned according to its instructions, the user should observe ordinary operation. Smoke from missed loose residue, an abnormal smell, an uneven door or an error code needs attention. Switch off and seek appropriate advice if safety is uncertain.
Cleaning completion is not an engineering test, so avoid treating a bright interior as proof that every component works correctly.
Where replacement parts are proposed, use components specified for the model and a competent repair route. A generic seal or improvised coating can alter how the appliance closes and heats. Keep cleaning and repair decisions distinct even when they occur during the same handover.